3D print accessories for Evo from the classroom or home and check out new lessons now available in Ozobot Classroom!
3D CAD Library
3D print accessories for Evo from the classroom or home and check out new lessonsnow available in Ozobot Classroom!
Previous
Next
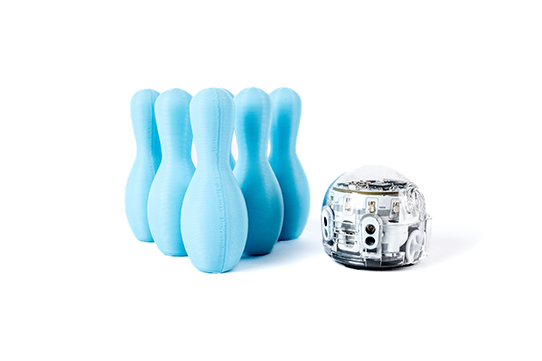
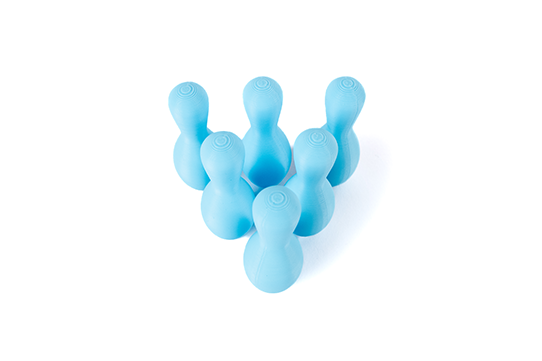
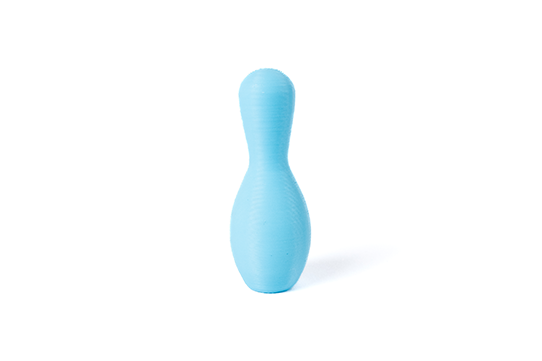
Bowling Pins
These perfect-sized bowling pins are a perfect match for our little bowling ball-shaped robot. Print as many as you like for one or more players. A standard bowling lane uses 10 pins.
Printing instructions for FDM printers: Send the .STL file to your preferred slicer. Make sure the bottom flat side of the pin is down. No supports are necessary. Printing with a raft is suggested. Print with a layer height no smaller than 0.2mm. Follow your filament’s recommendations for print temperature and speed.
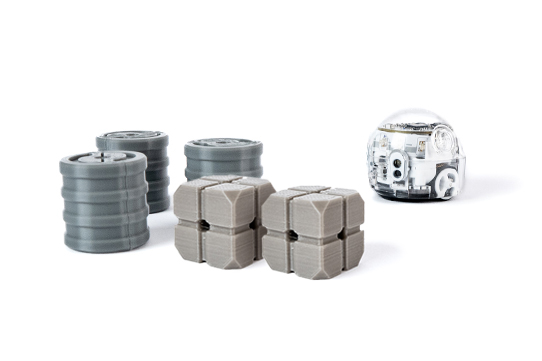
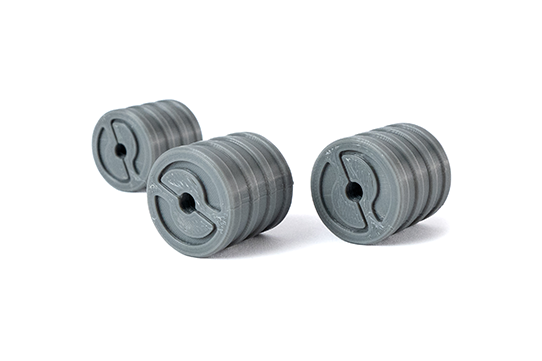
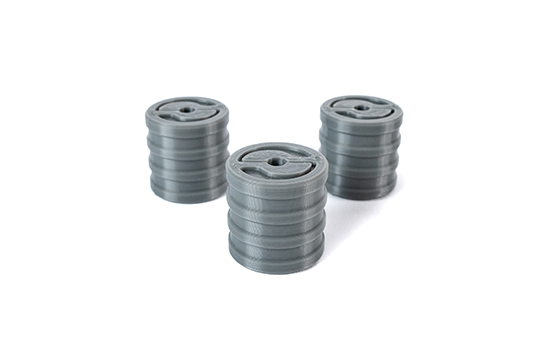
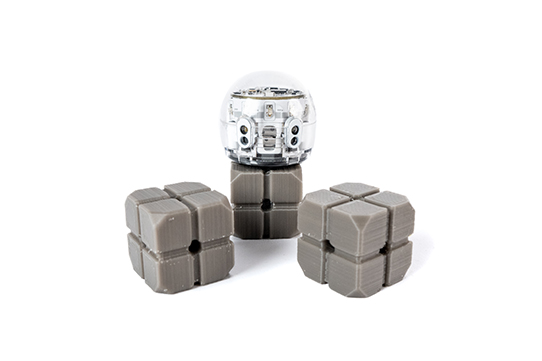
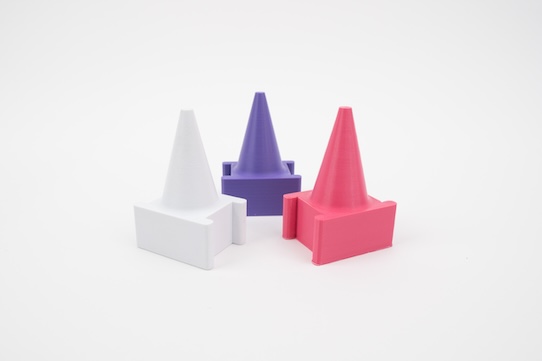
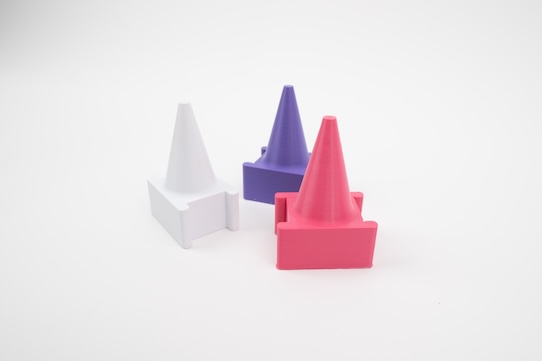
Each box or barrel can be used as an obstacle for Evo to sense and navigate around. They also are the perfect size for Evo to push or pull around with the Evo Dozer or Trailer.
Printing instructions for FDM printers: Send the .STL files to your preferred slicer. Make sure a flat side of the box or barrel is down. No supports are necessary. Print with a layer height no smaller than 0.2mm. Follow your filament’s recommendations for print temperature and speed.
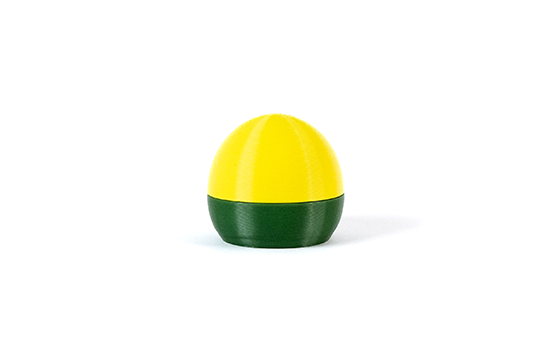
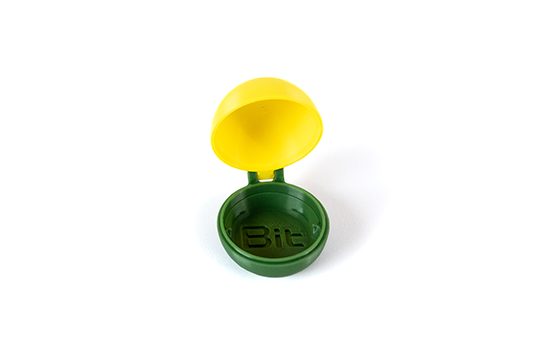
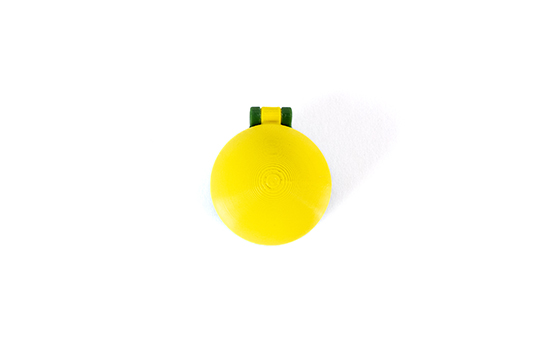
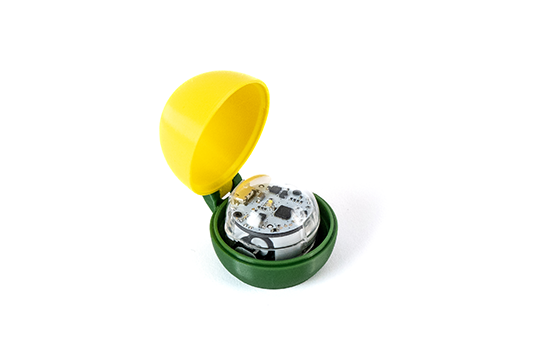
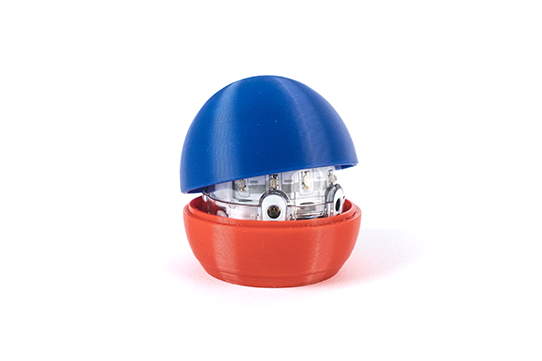
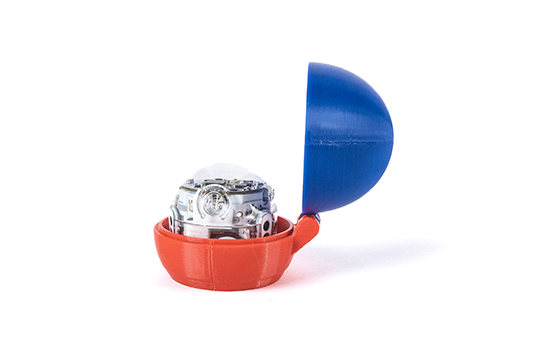
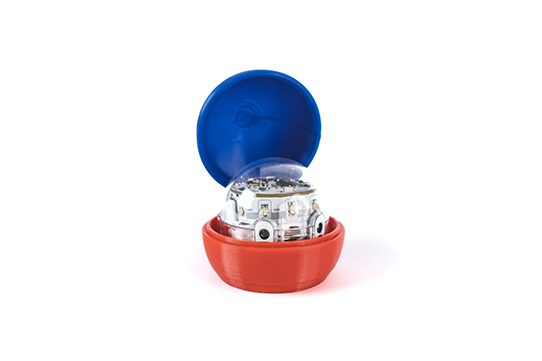
Protect your Ozobot Bit robot when it's riding around in your backpack or pocket. This little case keeps the Bit from turning on accidentally and keeps debris out of the optical sensors. Print it in two pieces and snap the hinge together.
Printing instructions for FDM printers: Send the .STL files to your preferred slicer. The case bottom needs to be flat side down. The case top needs to have the open side down. The case top will require supports. Printing with a raft is suggested. Print with a layer height no smaller than 0.2mm. Follow your filament’s recommendations for print temperature and speed.
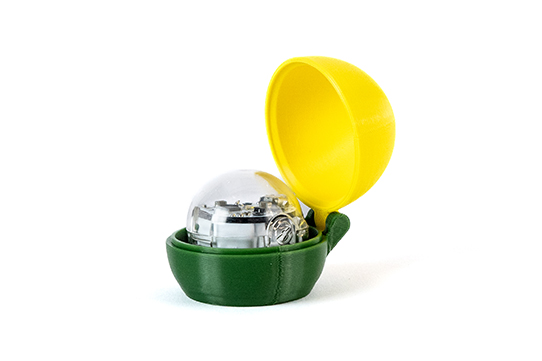
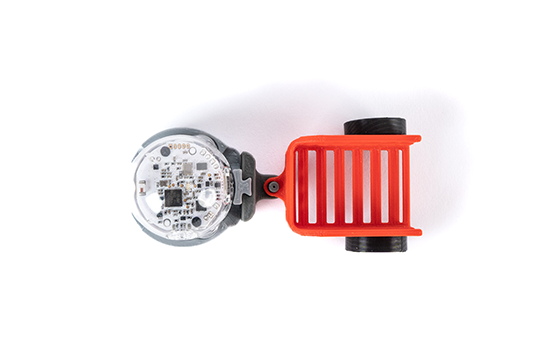
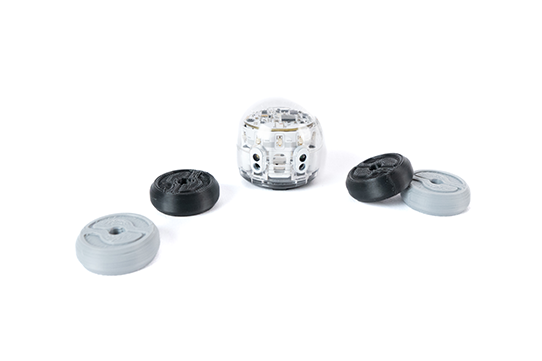
Protect your Ozobot Evo robot when it's riding around in your backpack or pocket. This little case keeps the Evo from turning on accidentally and keeps debris out of the optical sensors. Print it in two pieces and snap the hinge together.
Printing instructions for FDM printers: Send the .STL files to your preferred slicer. The case bottom needs to be flat side down. The case top needs to have the open side down. The case top will require supports. Printing with a raft is suggested. Print with a layer height no smaller than 0.2mm. Follow your filament’s recommendations for print temperature and speed.
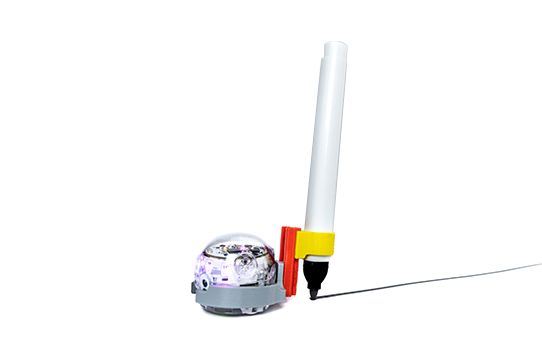
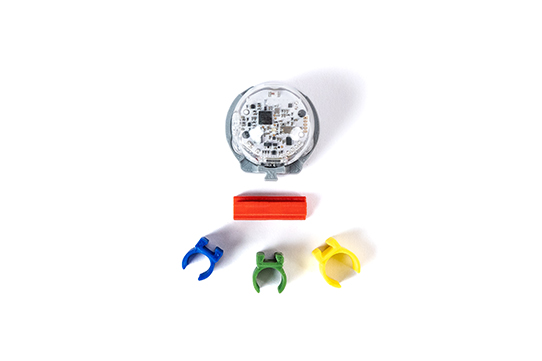
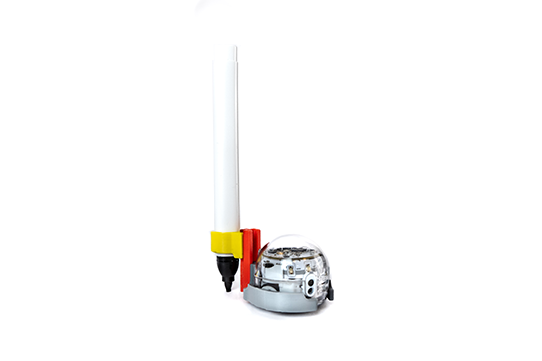
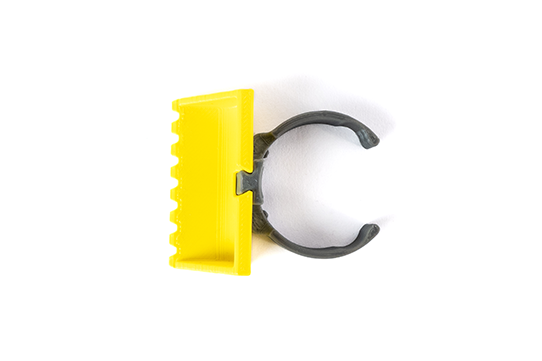
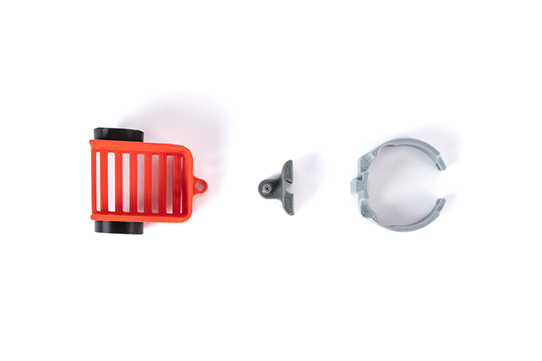
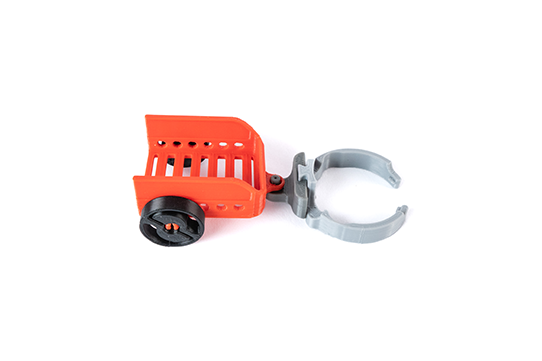
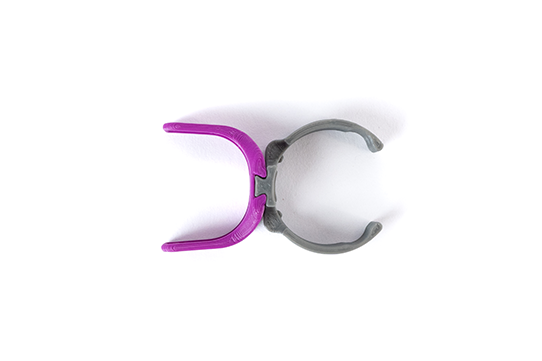
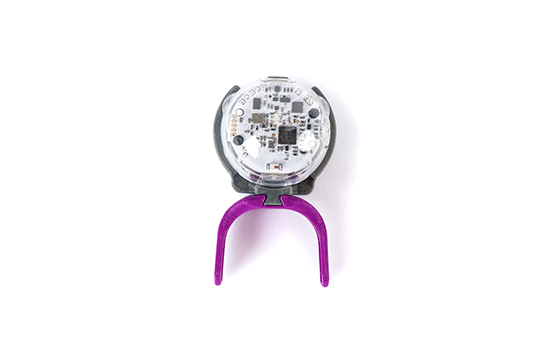
The pen holder consists of three primary parts - the clip (connects directly to Evo), the riser (for height adjustments), and the collar (holds the pen or marker). Using the dovetail ends, slide the three pieces together. Adjust accordingly so the tip of the marker or pen is just touching the writing surface. There are three collar sizes (9mm, 11mm, 13mm) to help get the best fit for your pen or marker.
Printing instructions for FDM printers: Send the .STL files to your preferred slicer. Make sure the bottom flat side of each piece is down. No supports are necessary. Printing with a raft is suggested. Print with a layer height no smaller than 0.2mm. Follow your filament’s recommendations for print temperature and speed.
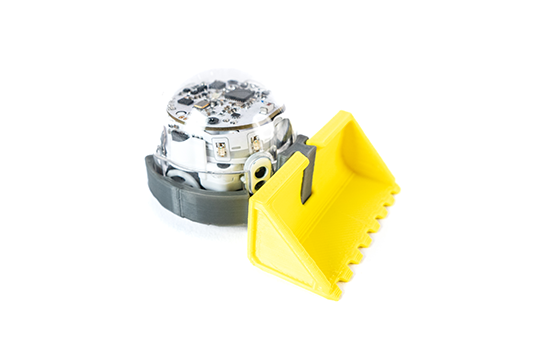
Use the mini dozer attachment to turn Evo into a big mover! Push, move, and even knock down any of our other object accessories like the Puck, Barrel, and Box.
Printing instructions for FDM printers: Send the .STL files to your preferred slicer. Make sure the bottom flat side of the dozer bucket is down. No supports are necessary. Printing with a raft is suggested. Print with a layer height no smaller than 0.2mm. Follow your filament’s recommendations for print temperature and speed.
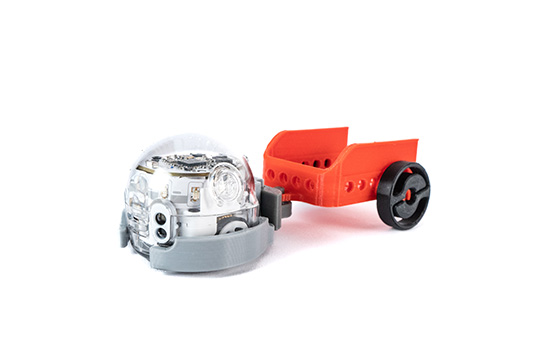
Turn Evo into a mini hauler. The redesigned trailer is print-in-place with easy to snap on wheels. Now your Evo can cart around small objects like our Puck, Barrel, and Box.
Printing instructions for FDM printers: Send the .STL files to your preferred slicer. Make sure the bottom flat side of each piece is down. No supports are necessary. Printing with a raft is suggested. Print with a layer height no smaller than 0.2mm. Follow your filament’s recommendations for print temperature and speed.
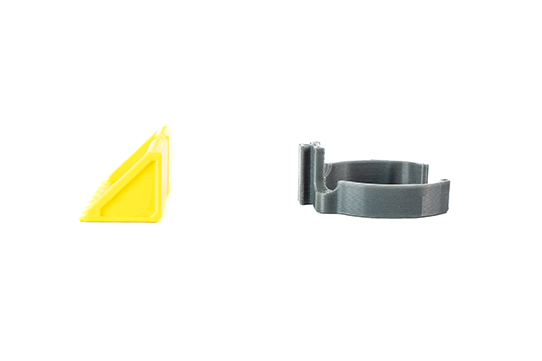
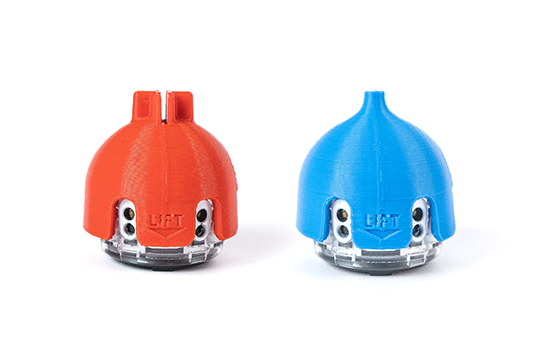
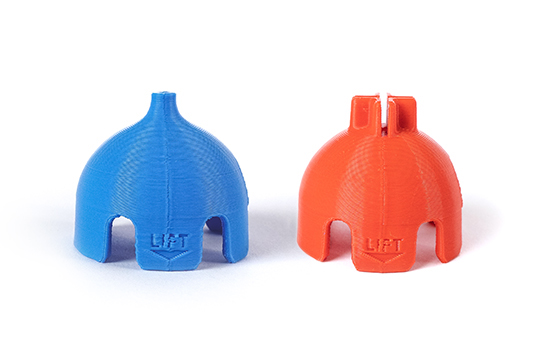
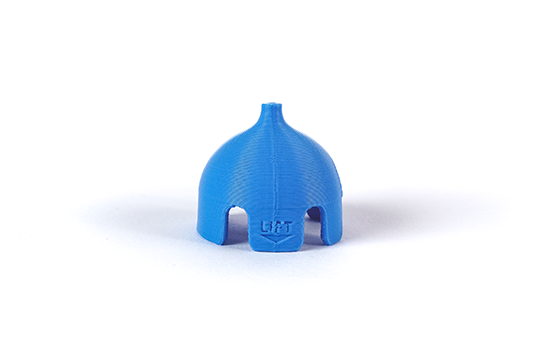
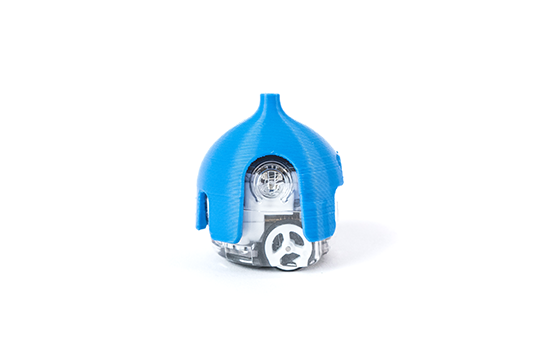
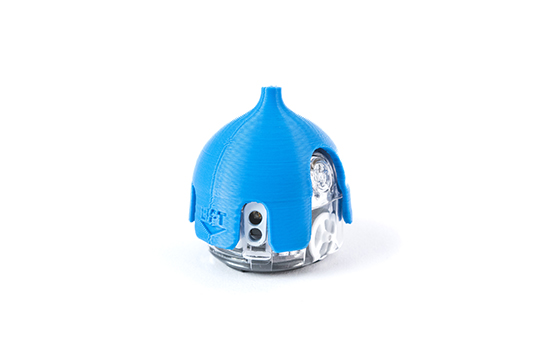
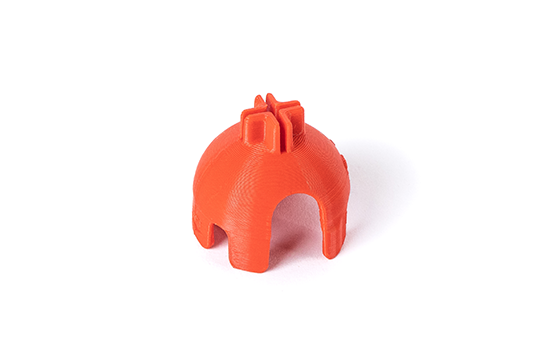
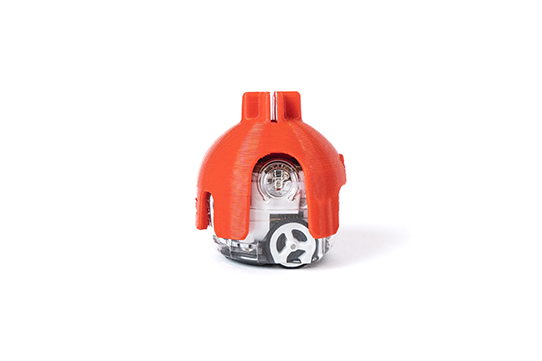
The versatile Evo hats add a new dimension to your robot’s personality. Each hat has a different way of connecting or attaching all sorts of creations that shows off your Evo’s best traits.
Printing instructions for FDM printers: Send the .STL files to your preferred slicer. Make sure to orient each hat so that the top of the hat is facing up. Supports are needed for a successful print. Printing with a raft is suggested. Print with a layer height no smaller than 0.2mm. Follow your filament’s recommendations for print temperature and speed.
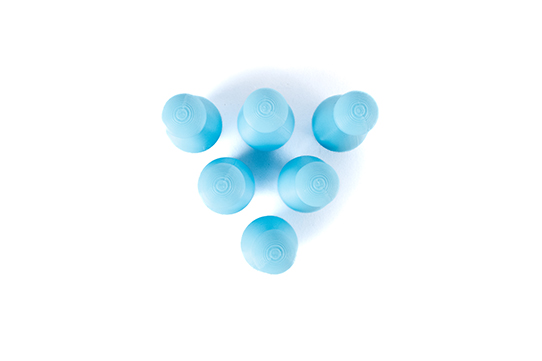
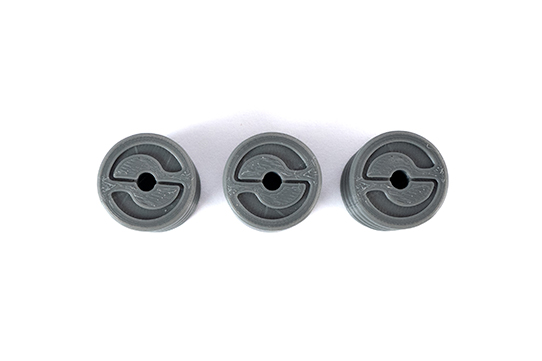
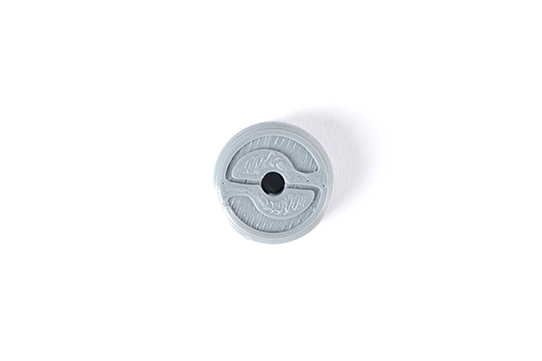
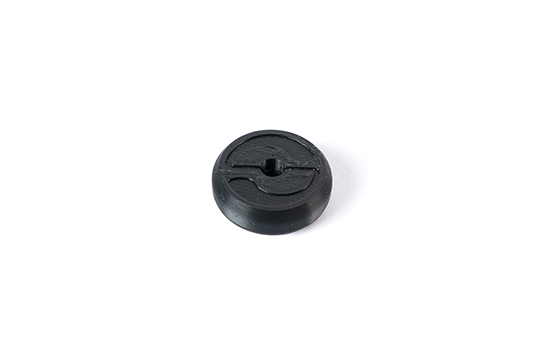
These pucks are perfect for your favorite Evo games or for hauling around from place to place in the Evo Trailer.
Printing instructions for FDM printers: Send the .STL file to your preferred slicer. Make sure each puck is laying flat. No supports are necessary. Print with a layer height no smaller than 0.2mm. Follow your filament’s recommendations for print temperature and speed.
This double hockey stick is Evo’s best shot at scoring a goal! It’s made to effortlessly move the puck from place to place, and works great for moving other small objects like the Barrel and Box.
Printing instructions for FDM printers: Send the .STL files to your preferred slicer. Make sure the bottom flat side of each piece is down. No supports are necessary. Printing with a raft is suggested. Print with a layer height no smaller than 0.2mm. Follow your filament’s recommendations for print temperature and speed.
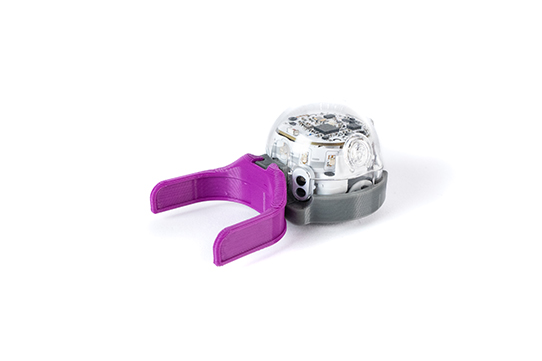
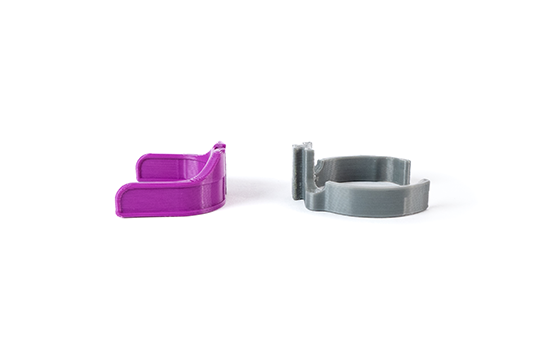
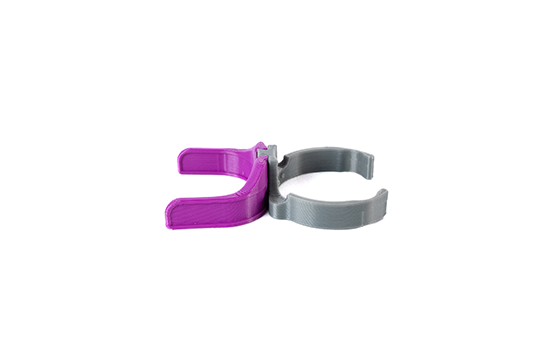
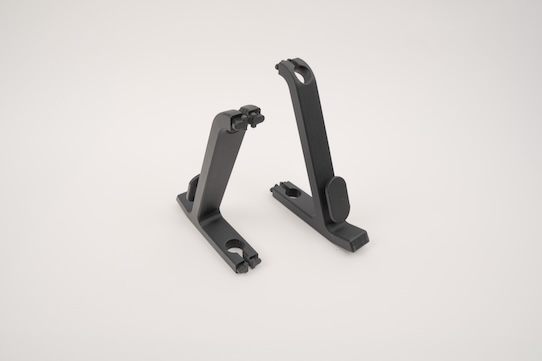
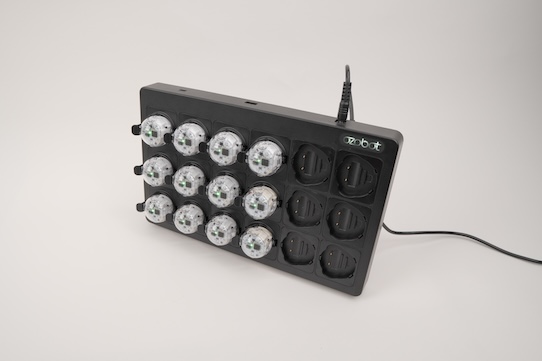
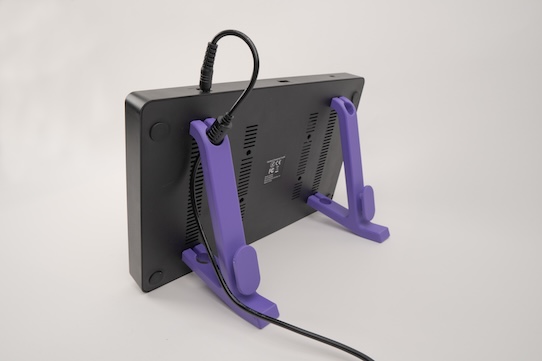
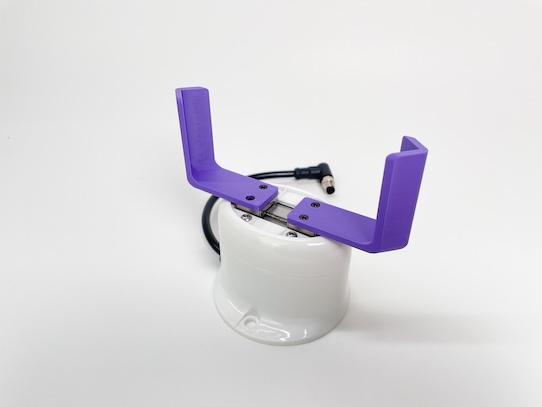
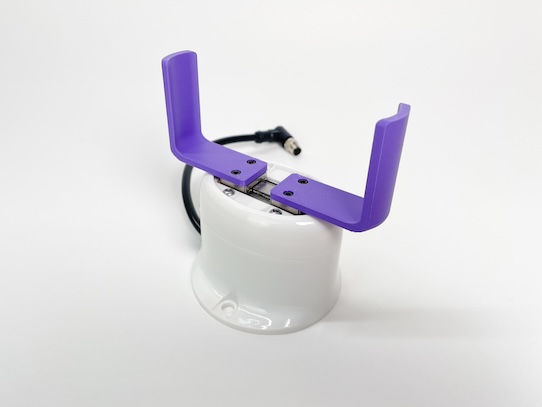
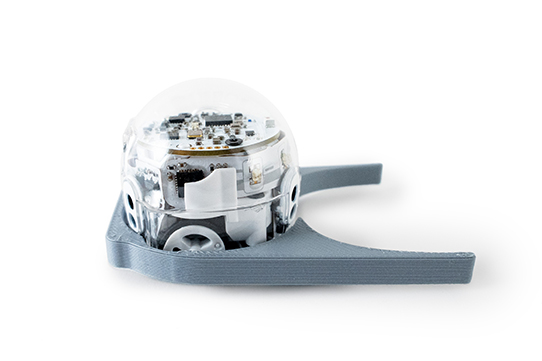
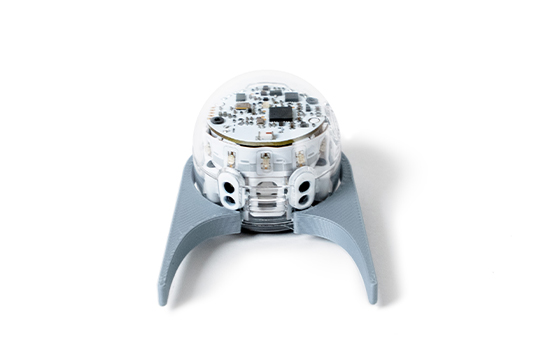
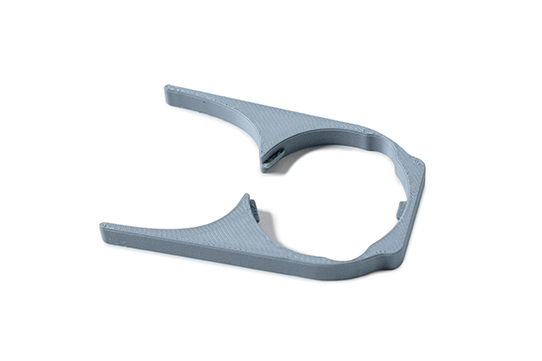
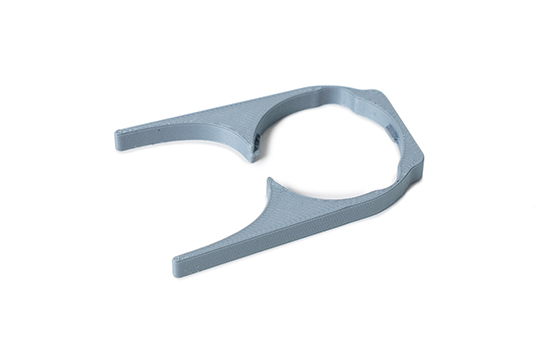
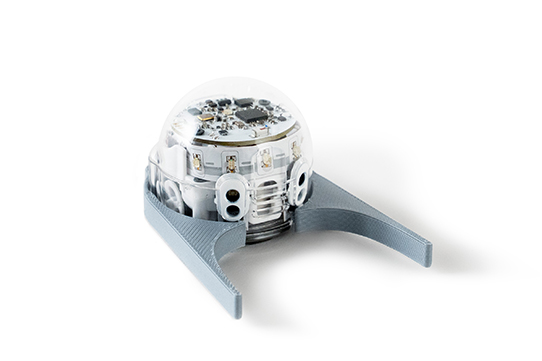
This specially designed stand supports your Evo robots while they charge, keeping your classroom setup tidy and efficient. The stand features two support arms that securely hold your Evo's upright, with strategic openings to accommodate the charging cable.
Printing instructions for FDM printers: Send the .STL files to your preferred slicer. Make sure the bottom flat side of each piece is down. No supports are necessary. Printing with a raft is suggested. Print with a layer height no smaller than 0.2mm. Follow your filament’s recommendations for print temperature and speed.
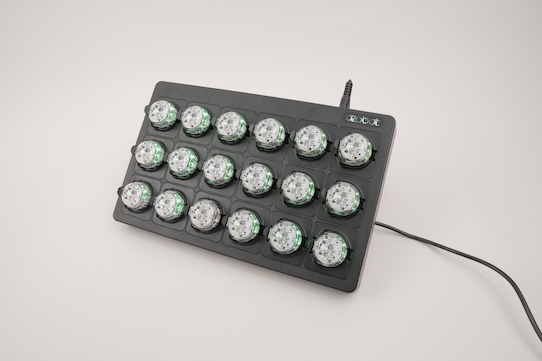
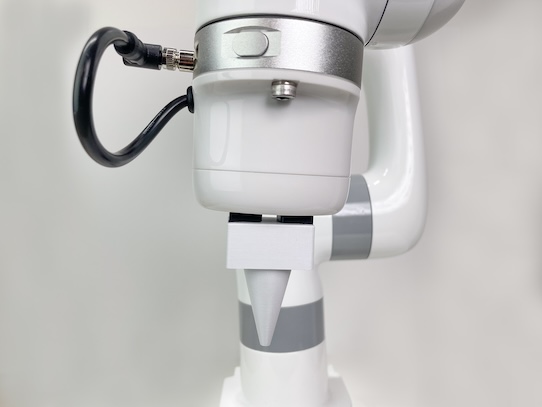
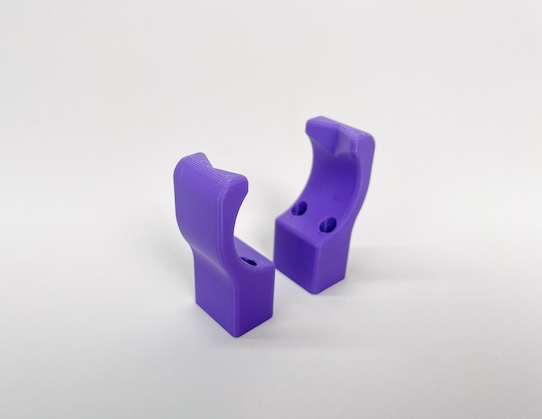
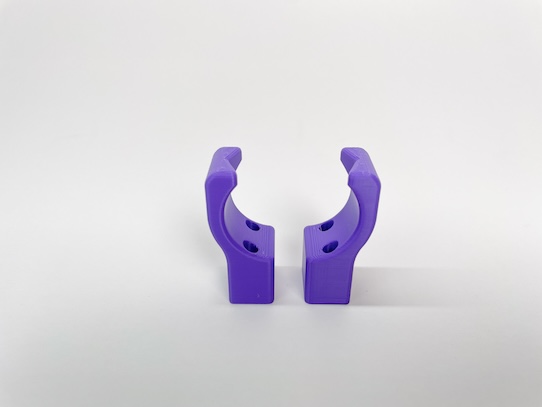
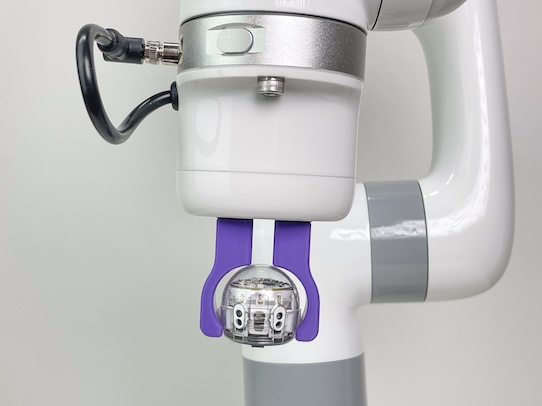
The ORA Calibration Tool is an essential accessory for maintaining precise performance of your Ozobot Robotic Arm. The calibration process is a key part of real-world manufacturing maintence, giving students hands-on experience with professional cobot procedures.
Printing instructions for FDM printers: Send the .STL files to your preferred slicer. Make sure the bottom flat side of each piece is down. No supports are necessary. Printing with a raft is suggested. Print with a layer height no smaller than 0.2mm. Follow your filament’s recommendations for print temperature and speed.
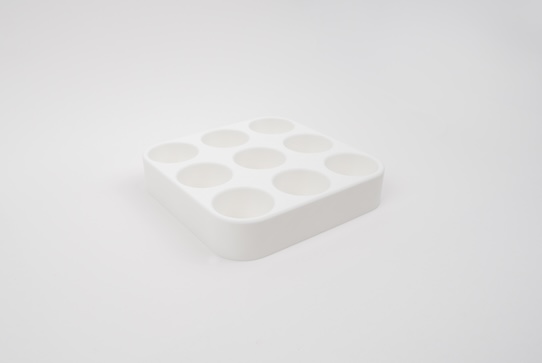
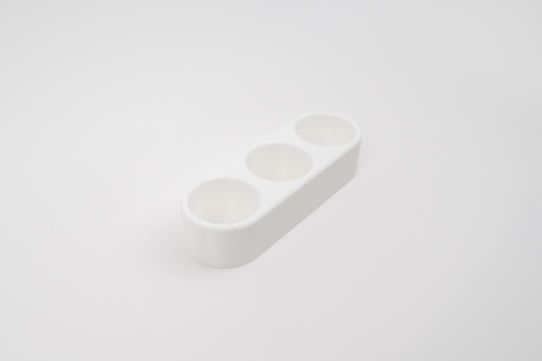
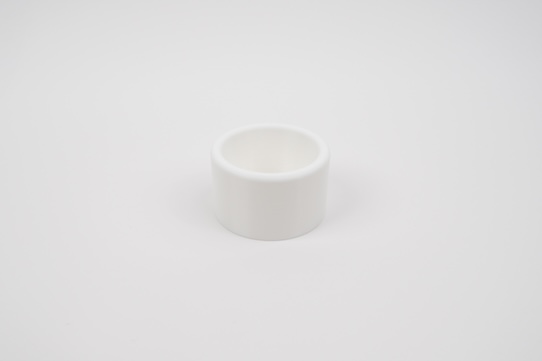
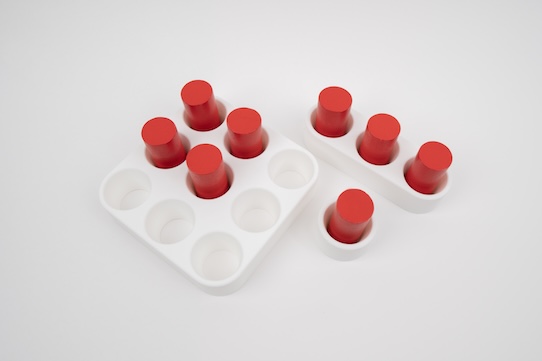
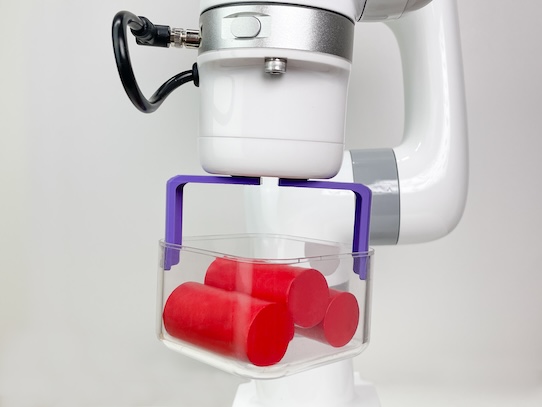
Keep cylindrical objects organized and accessible with this specialized holder for your ORA workspace, enhancing hands-on learning experiences in process engineering and factory operations.
Printing instructions for FDM printers: Send the .STL files to your preferred slicer. Make sure the bottom flat side of each piece is down. No supports are necessary. Printing with a raft is suggested. Print with a layer height no smaller than 0.2mm. Follow your filament’s recommendations for print temperature and speed.
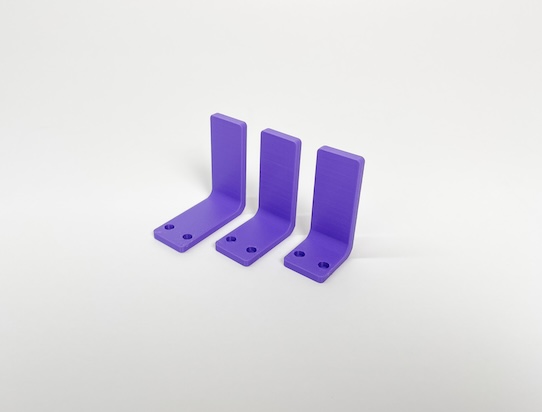
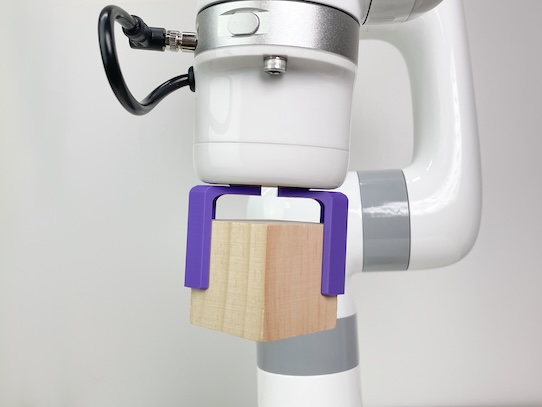
Enhance your ORA's gripping capabilities with these durable flat jaw attachments. The L-shaped design provides stable and secure handling of objects and materials during robotic arm operations.
Printing instructions for FDM printers: Send the .STL files to your preferred slicer. Make sure the bottom flat side of each piece is down. No supports are necessary. Printing with a raft is suggested. Print with a layer height no smaller than 0.2mm. Follow your filament’s recommendations for print temperature and speed.
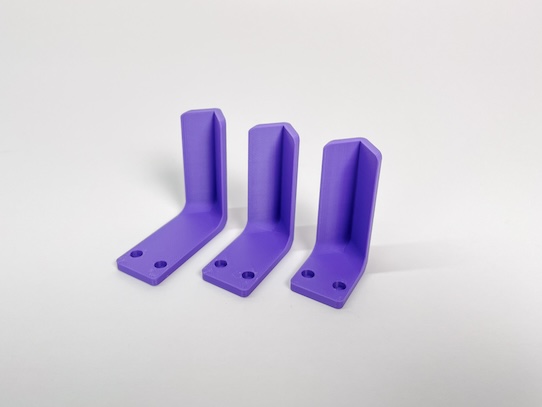
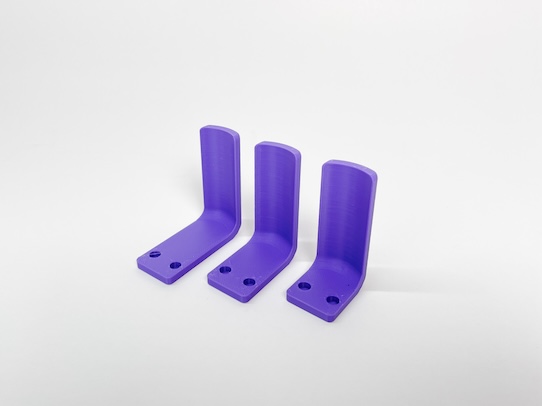
Enhance your ORA's precision handling capabilities with these angle jaw attachments, perfect for gripping corners and working with angular objects. The L-shaped pointed design allows the robotic arm to securely manipulate items in more intricate tasks.
Printing instructions for FDM printers: Send the .STL files to your preferred slicer. Make sure the bottom flat side of each piece is down. No supports are necessary. Printing with a raft is suggested. Print with a layer height no smaller than 0.2mm. Follow your filament’s recommendations for print temperature and speed.
Expand your ORA's versatility with these curved jaw attachments, specifically designed for gripping cylindrical and rounded objects with stability. The L-shaped rounded design provides optimal contact surface for handling tubes, bottles, and other circular items in your robotics projects.
Printing instructions for FDM printers: Send the .STL files to your preferred slicer. Make sure the bottom flat side of each piece is down. No supports are necessary. Printing with a raft is suggested. Print with a layer height no smaller than 0.2mm. Follow your filament’s recommendations for print temperature and speed.
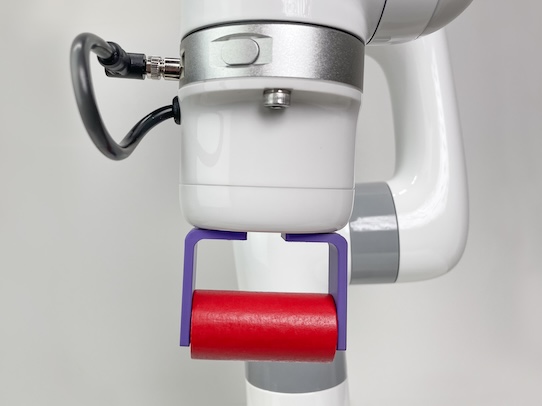
This specialized jaw attachment allows your ORA to securely grip both EVO robots and cylindrical objects. The unique curved design provides a stable hold for programming pick-and-place operations.
Printing instructions for FDM printers: Send the .STL files to your preferred slicer. Make sure the bottom flat side of each piece is down. No supports are necessary. Printing with a raft is suggested. Print with a layer height no smaller than 0.2mm. Follow your filament’s recommendations for print temperature and speed.
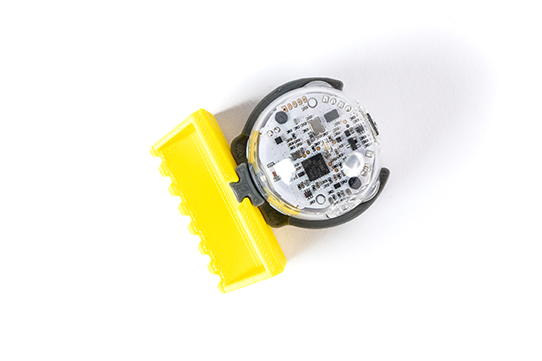
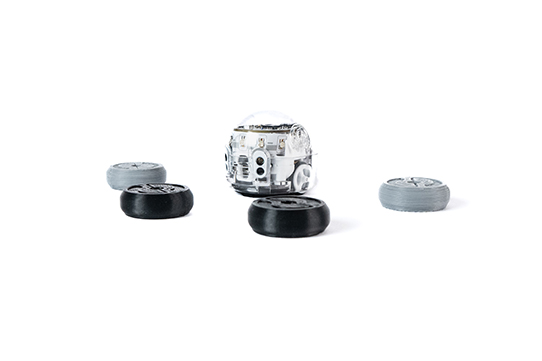
Upgrade your Ozobot Evo with our precision-engineered 3D-printed arms. Designed for maximum stability across all Ozobot Challenge Mats, these durable attachments create a stronger connection that enhances performance during lessons and activities. Experience fewer disruptions and more successful completions with these classroom-tested robot extensions.
Printing instructions for FDM printers: Send the .STL files to your preferred slicer. Make sure the bottom flat side of each piece is down. No supports are necessary. Printing with a raft is suggested. Print with a layer height no smaller than 0.2mm. Follow your filament’s recommendations for print temperature and speed.
Until now, only Evo could be used with Ozobot Challenge Mats. With these precision-engineered 3D-printed arms, Ari is now fully compatible too. The durable attachments provide extra stability, helping Ari move smoothly across every mat during lessons and activities. That means fewer disruptions, more accurate runs, and even more ways to bring coding to life in the classroom.
Printing instructions for FDM printers:
Send the .STL files to your preferred slicer. Place the flat side of each piece down. No supports are needed. Printing with a raft is suggested. Use a layer height of 0.2mm or larger. Follow your filament’s recommendations for print temperature and speed.
The pen holder consists of three primary parts—the clip (connects directly to Ari), the riser (for height adjustments), and the collar (holds the pen or marker). Using the dovetail ends, slide the three pieces together. Adjust so the tip of the marker or pen just touches the writing surface. Three collar sizes (9mm, 11mm, 13mm) are included to help you get the best fit for your pen or marker.
Printing instructions for FDM printers:
Send the .STL files to your preferred slicer. Place the flat side of each piece down. No supports are needed. Printing with a raft is suggested. Use a layer height of 0.2mm or larger. Follow your filament’s recommendations for print temperature and speed.
Attach the mini dozer to transform Ari into a powerful mover! Push, collect, or knock down lightweight objects such as the Puck, Barrel, and Box. Great for open-ended play or engineering-based coding activities.
Printing instructions for FDM printers: Send the .STL files to your preferred slicer. Make sure the bottom flat side of the dozer bucket is down. No supports are necessary. Printing with a raft is suggested. Print with a layer height no smaller than 0.2mm. Follow your filament’s recommendations for print temperature and speed.
This double hockey stick is Ari’s best shot at scoring a goal! It’s designed to move the puck with precision and can easily push other small objects like the Barrel and Box. Perfect for robotics games and classroom challenges.
Printing instructions for FDM printers: Send the .STL files to your preferred slicer. Make sure the bottom flat side of the dozer bucket is down. No supports are necessary. Printing with a raft is suggested. Print with a layer height no smaller than 0.2mm. Follow your filament’s recommendations for print temperature and speed.
Turn Ari into a mini hauler. This print-in-place trailer features easy-to-attach wheels that snap on securely. Haul small objects like the Puck, Barrel, and Box while exploring lessons in motion, force, and teamwork.
Printing instructions for FDM printers: Send the .STL files to your preferred slicer. Make sure the bottom flat side of the dozer bucket is down. No supports are necessary. Printing with a raft is suggested. Print with a layer height no smaller than 0.2mm. Follow your filament’s recommendations for print temperature and speed.